How to take a passport photo at home
A photo that passes is mostly decided before the shutter is pressed. Get four things right, the distance, the light, the background and the pose, and there is nothing left to fix afterwards.
By Yaseen Khan. Last checked against the official sources on 11 November 2026.
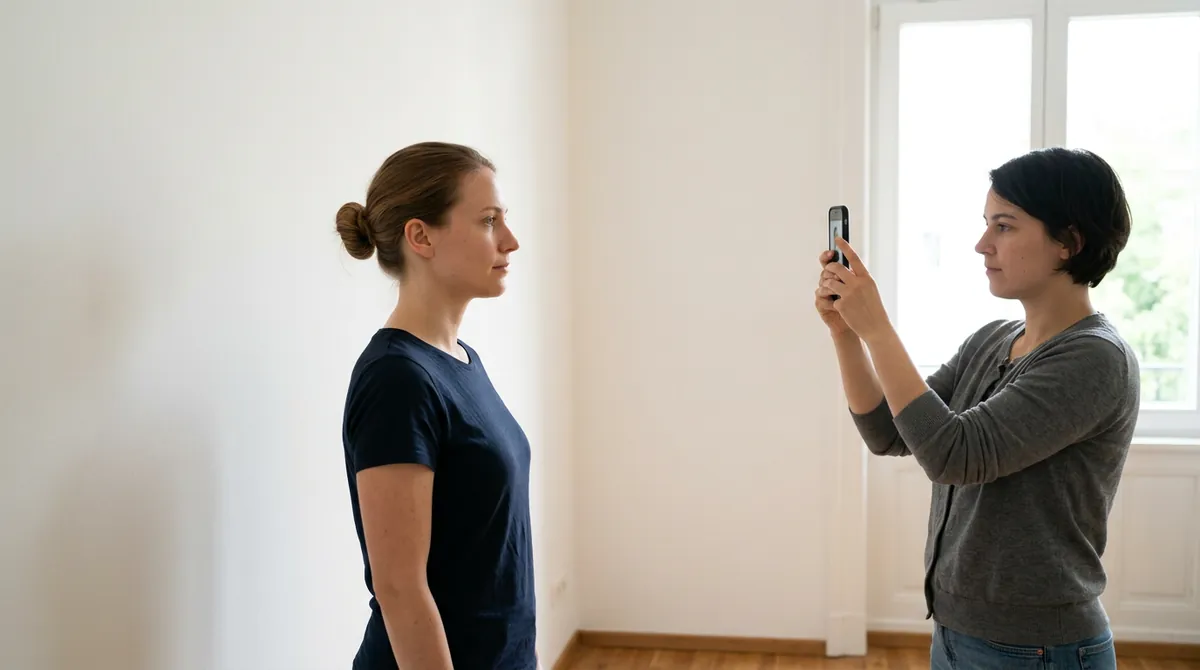
1. Ask someone else to hold the camera
Ireland and New Zealand refuse selfies for passports, and the UK tells online applicants they will need someone to help. The reason is distance. A camera close to the face exaggerates the nose and shrinks the ears; New Zealand's passport office names this as the top reason photos are rejected, and Australia lists “distortion, camera too close” among its unacceptable examples.
- Stand about 1.5 metres from the camera.
- Hold the camera at the subject's eye level, not above or below.
- Use the phone's back camera. Do not use zoom; crop afterwards instead.
- Hold the phone upright (portrait).
- No helper? Prop the phone at eye level and use the self-timer.
2. Use daylight from the front
- Face a window in the daytime, with the window behind the camera.
- Avoid direct sun on the face, which causes hard shadows and squinting.
- Turn off ceiling lights. Light from above puts shadows under the eyes and nose.
- Do not use flash. It causes red eye, glare on glasses and a shadow on the wall.
3. Find a plain, light wall
Most documents want a plain light background, but the exact colour differs, so check your document's page first. A United States photo needs white or off-white. A printed UK passport photo needs cream or light grey. The OCI card and the New Zealand visa ask for a light colour that is not white.
- Stand at least half a metre in front of the wall so your shadow does not fall on it.
- No doors, switches, pictures or furniture in the frame.
- If you have no bare wall, hang a plain, ironed sheet.
- Wear a top that contrasts with the background.
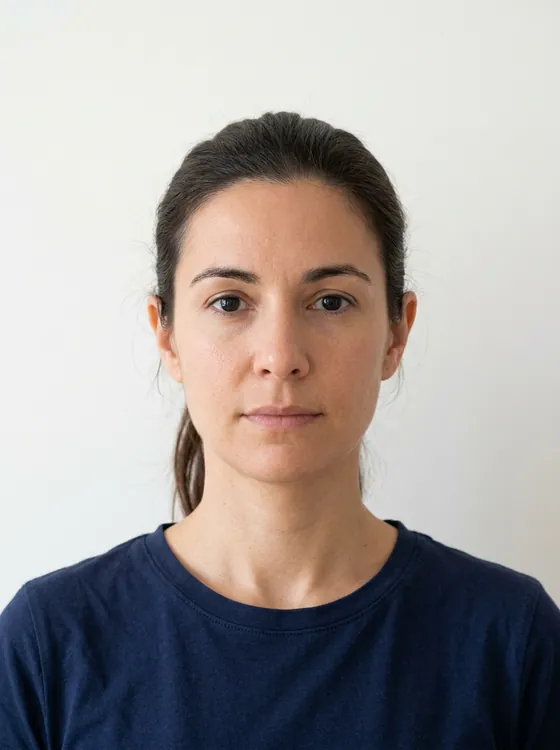 ✓ Good: plain background, even light, neutral face
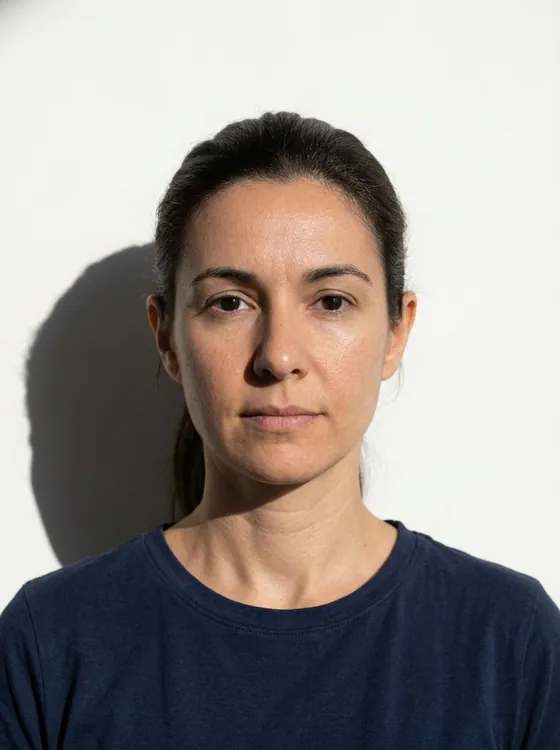 ✕ Shadow on the wall and face
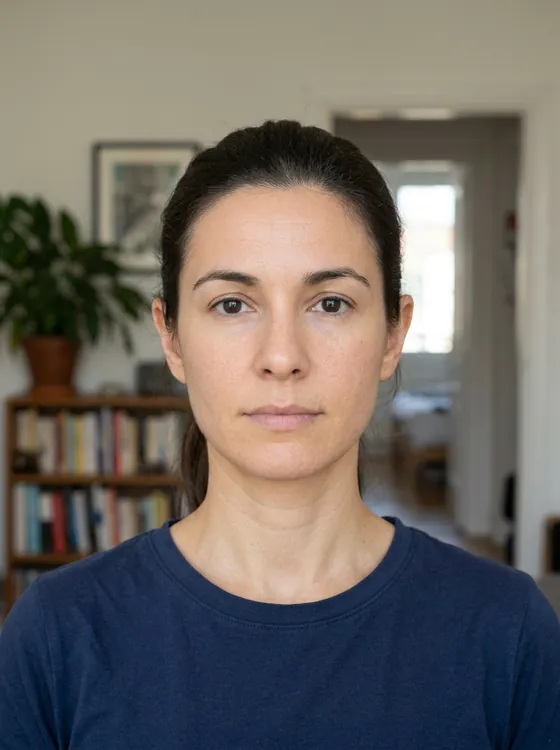 ✕ Busy background
4. Set the phone up plainly
- Use the normal photo mode. Portrait mode blurs the edges of hair and ears, and beauty or skin-smoothing settings count as editing.
- Turn off filters.
- Clean the lens.
- Leave plenty of space around the head and include the shoulders and upper chest. A loose photo can always be cropped; a tight one cannot be widened.
5. Pose
- Face the camera square on, shoulders level, head not tilted.
- Eyes open, looking into the lens.
- Mouth closed and a neutral expression. A slight natural smile is acceptable for a United States passport; most other countries ask for none.
- Hair away from the eyes. For a China visa, the ears should be visible too.
- Take glasses off unless your document allows them. The United States, the DV lottery and the Indian e-Visa do not.
- No hat or head covering, unless you wear one for religious or medical reasons.
6. Take several, then check
Take five or six photos and choose the sharpest one where the eyes are fully open. Then use the original file, not a copy sent through a messaging app, which shrinks photos and can drop them below a form's minimum size.
Add it to the ID photo maker and choose your document. The tool frames the head, measures it against the rule, and flags shadows, tilt, closed eyes and low resolution. If something is flagged, retake the photo. Do not fix it in an editor: see why edited photos are refused.
Babies and small children
- Lay a baby on a plain, light sheet and photograph from directly above. The UK, Ireland and the DV lottery instructions all describe this.
- No toys, dummies or soothers in the picture, and no visible hands.
- Rules on expression and open eyes are relaxed for the youngest children in some countries. The UK, for example, does not require babies under one to have their eyes open. Check your document's page.
Official sources
The rules in this guide come from these pages, read on the date shown at the top:
- New Zealand Passports: passport photos
- Department of Foreign Affairs (Ireland): photo guidelines
- Federal Register: Diversity Immigrant Visa Program instructions
- Government of India: e-Visa photo instructions
- Chinese Visa Application Service Center: photo requirements
- GOV.UK: Photos for passports